tkinter Button
Up to now, at least I know, I didn't see any advantages for theme widgets in ttk over general widgets. Instead, I think tk.widgets is way too better than ttk.widgets.
For example, you can directly see every its options showing in tk.widget, however, in ttk.widget, you have to use w.style.configure() as a workaround.
So, it will be clear that which widget you should choose when you are hesitating on your decision.
Now, let me go deep in tk.Button
link: tkinter-button
text
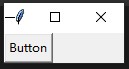
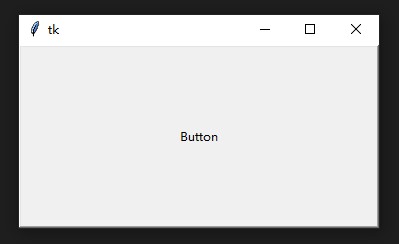
if we simply generate a button;
codes download: tk-button-text.py
import tkinter as tk

root = tk.Tk()

btn = tk.Button(root,text='Button')

btn.grid(row=0,column=0)
root.mainloop()
its button size will only depends on its text size, just make it slightly contain its text.
textvariable
option textvariable is an instance of StringVar(), common thing between it and text is they can be both used to render texts. However, textvariable is more advanced, its contents can be dynamically changed.
Beside, when both text and textvariable are defined, text will be discarded.
proof 1, when they are conflicts
codes download: tk-button-textvariable
import tkinter as tk

root = tk.Tk()

txt_var = tk.StringVar()
txt_var.set('Knob')
btn = tk.Button(root,text='Button',textvariable=txt_var)

btn.grid(row=0,column=0)
root.mainloop()
result
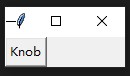
we can see, only “Knob” is shown.
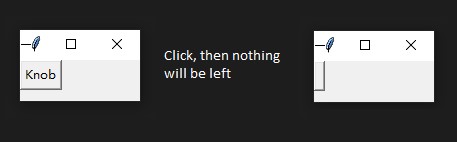
proof 2, delete contents of textvariable
be careful: in here, the word delete only means purge the contents, it cannot delete StringVar() object, also there is no del method for StringVar().
codes download: tk-button-remove-contexts
import tkinter as tk

root = tk.Tk()

txt_var = tk.StringVar()
txt_var.set('Knob')
btn = tk.Button(root,text='Button',textvariable=txt_var,
                command=lambda:txt_var.set('')
)

btn.grid(row=0,column=0)
root.mainloop()
proof 3, initialization with nothing or set to None
now, let us think more deep, how will it come when it's initialized with nothing or set to None?
import tkinter as tk

root = tk.Tk()

txt_var = tk.StringVar()
#txt_var.set('Knob')        # comment out this len
btn = tk.Button(root,text='Button',textvariable=txt_var,
                command=lambda:txt_var.set(None)
)

# function is set to None

btn.grid(row=0,column=0)
root.mainloop()
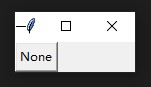
the initial value of StringVar() is '', so you will get the same thing at the beginning as in proof 2 when button is generated.
However, if you press it and set textvariable to None, which will be finally converted to its string.
width & height
we need to some references, link: tk-dimensions
If you set a dimension to an integer, it is assumed to be in pixels.
You can specify units by setting a dimension to a string containing a number followed by:
| Suffix | Meaning |
|---|---|
| c | Centimeters |
| i | Inches |
| m | Millimeters |
| p | Printer's points (about 1/72″) |
As we have already discussed, if there is no dimension specified, the size of tk.Button is only depended on its contents.
dimension in integer
codes download: tk-button-dimension
import tkinter as tk

root = tk.Tk()

btn = tk.Button(root,text='Button',
                width=50,
                height=10,
)

btn.grid(row=0,column=0)
root.mainloop()
compared with original button, we can see this button becomes pretty bigger.
others
you can specify width='50c', which means dimension in 50 centimeters, for others, they are in the same formula but with different suffixes.
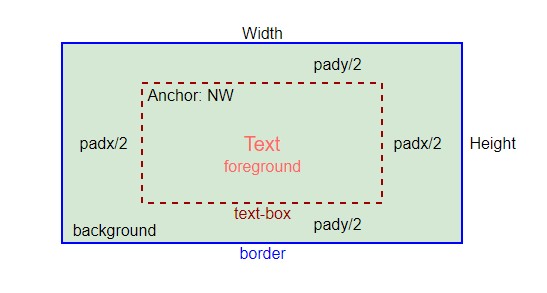
padx & pady
padx: additional padding left and right for text.
pady: additional padding above and below for text.
note, this type of padding will equally pad on both corresponding sides for a half of given value.
codes download: tk-button-pad
import tkinter as tk

root = tk.Tk()

btn = tk.Button(root,text='Button',
                padx=50,
                pady=10
)

btn.grid(row=0,column=0)
root.mainloop()
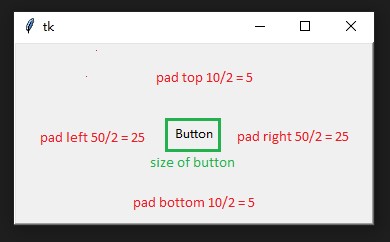
So, the size of this button is in the same size with button generated by width=50, height=10.
Caution: the padding of this option is only padded on the exterior of text container, so the “size” of its text container is not changed, as shown in “green rectangle”, and I will denote this container as “text box”.
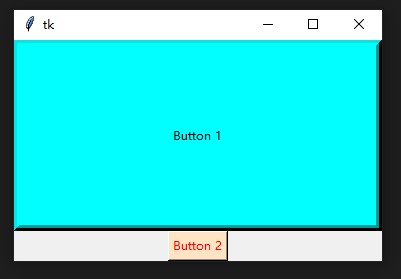
anchor
position of text alignment when “text box” is larger than the size of text.
important, by using this option, we can clear see the difference between padx & pady and width & height.
codes download: tk-button-anchor
import tkinter as tk

root = tk.Tk()

btn_1 = tk.Button(root,
        text='Button 1',
        width=50,
        height=10,
        anchor='w',
        bg='cyan'
)

btn_2 = tk.Button(root,
        text='Button 2',
        padx=50,
        pady=50,
        anchor='w',
        bg='bisque'
)

btn_1.grid(row=0,column=0)
btn_2.grid(row=1,column=0)
root.mainloop()
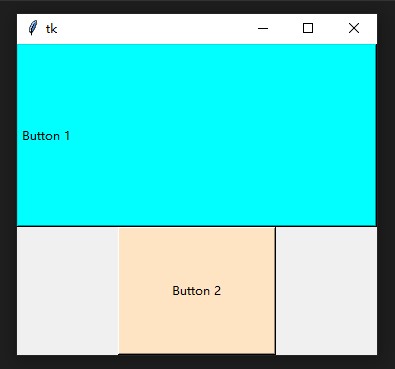
we can see,
- anchor only works on when “text-box” is bigger than size of text
-
padx & padyonly pads on outside of “text box” - the unit for
padx & padyis - the unit for
width & heightis
Now, I totally figured out what is the unit for “3” & “4”, please refer this question & answer: stackoverflow-change-font-size-without-messing-with-tkinter-button-size
Actually, the size of tk.Button is based on the size of character that it contains (meaningful & reasonable).
And for the workaround, wow, they are so brilliant, thanks for those talent peoples' contributing!
justify
this works for multiple text lines.
codes download: tk-button-justify
import tkinter as tk

root = tk.Tk()

btn = tk.Button(root,
        text='Button in line 1\nAnother text in line 2\nAdditional info in line 3',
        width=50,
        height=10,
        justify=tk.LEFT
)

btn.grid(row=0,column=0)
root.mainloop()
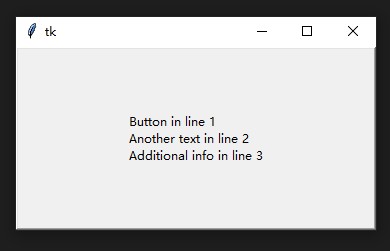
Also, you can use python string define its value, justify='left'.
Note, the keyword has to be in small cases, otherwise, the Exception will be raised if you use justify=LEFT or justify=Left, (I really don't understand why it has such restriction), the same things on tk.RIGHT & tk.CENTER.
border and colors
codes download: tk-button-border-colors
import tkinter as tk

root = tk.Tk()

btn_1 = tk.Button(root,
        text='Button 1',
        width=50,
        height=10,
        bg='cyan',
        bd='6',
)

btn_2 = tk.Button(root,
        text='Button 2',
        bg='bisque',
        fg='red'
)


btn_1.grid(row=0,column=0)
btn_2.grid(row=1,column=0)
root.mainloop()
Just like its name, bg == background, fg == foreground, bd == borderwidth.
Note: for color, either its name or hex-code can be accepted.
link: w3school-hex-color-code-picker
Also, link for: color-names
relief
codes download: tk-button-relief
import tkinter as tk

root = tk.Tk()

btn_1 = tk.Button(root,text='FLAT',width=20,height=8,bg='salmon',
    bd=6,relief='flat'
)

btn_2 = tk.Button(root,text='RAISED',width=20,height=8,bg='hotpink',
    bd=6,relief='raised'
)

btn_3 = tk.Button(root,text='SUNKEN',width=20,height=8,bg='limegreen',
    bd=6,relief='sunken'
)

btn_4 = tk.Button(root,text='GROOVE',width=20,height=8,bg='gold',
    bd=6,relief='groove'
)

btn_5 = tk.Button(root,text='RIDGE',width=20,height=8,bg='plum',
    bd=6,relief='ridge'
)


btn_1.grid(row=0,column=0)
btn_2.grid(row=0,column=1)
btn_3.grid(row=0,column=2)
btn_4.grid(row=1,column=0)
btn_5.grid(row=1,column=1)

root.mainloop()
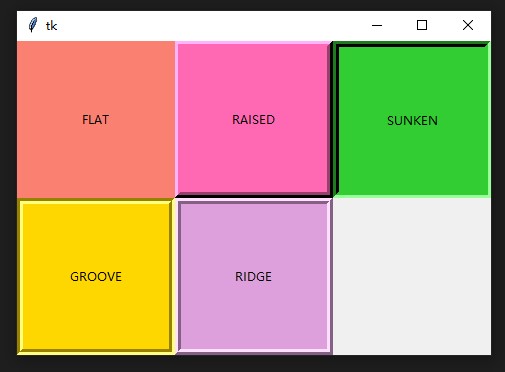
Note: option overrelief is the effect when mouse is on the button. Still, for their values, only small cases are accepted if you are using python strings.
active and focus
they are self-explanatory
- activebackground
- activeforeground
- cursor
- state
- disabledforeground
- highlightbackground
- highlightcolor
- highlightthickness
- takefocus
image and bitmap
instead showing text, button can be rendered with pictures.
- bitmap
- image
command
function to be called when button is pressed.
Conclusion